
23 Working with Maven (Appendix) - Reference Documentation
Authors: Andrea Del Bene, Carsten Hufe, Christian Kroemer, Daniel Bartl
Version: 1.0.0.BUILD-SNAPSHOT
Table of Contents
23 Working with Maven (Appendix)
23.1 Switching Wicket to DEPLOYMENT mode
As pointed out in the note at page 9, Wicket can be started in two modes, DEVELOPMENT and DEPLOYMENT. When we are in DEVELOPMENT mode Wicket warns us at application startup with the following message:******************************************************************** *** WARNING: Wicket is running in DEVELOPMENT mode. *** *** ^^^^^^^^^^^ *** *** Do NOT deploy to your live server(s) without changing this. *** *** See Application#getConfigurationType() for more information. *** ********************************************************************
<filter>
	<filter-name>wicket.MyApp</filter-name>
	<filter-class>org.apache.wicket.protocol.http.WicketFilter</filter-class>
	<init-param>
		<param-name>applicationClassName</param-name>
		<param-value>org.wicketTutorial.WicketApplication</param-value>
	</init-param>
	<init-param>
            <param-name>configuration</param-name>
            <param-value>deployment</param-value>
	</init-param>
</filter><context-param>
<param-name>configuration</param-name>
<param-value>deployment</param-value>
</context-param>java -Dwicket.configuration=deployment ...
23.2 Creating a Wicket project from scratch and importing it into our favourite IDE
In order to follow the instructions of this paragraph you must have Maven installed on your system. The installation of Maven is out of the scope of this guide but you can easily find an extensive documentation about it on Internet. Another requirement is a good Internet connection (a flat ADSL is enough) because Maven needs to connect to its central repository to download the required dependencies.
From Maven to our IDE
Wicket project and its dependencies are managed using Maven1. This tool is very useful also when we want to create a new project based on Wicket from scratch. With a couple of shell commands we can generate a new project properly configured and ready to be imported into our favourite IDE. The main step to create such a project is to run the command which generates project's structure and its artifacts. If we are not familiar with Maven or we simply don't want to type this command by hand, we can use the utility form on Wicket site at http://wicket.apache.org/start/quickstart.html :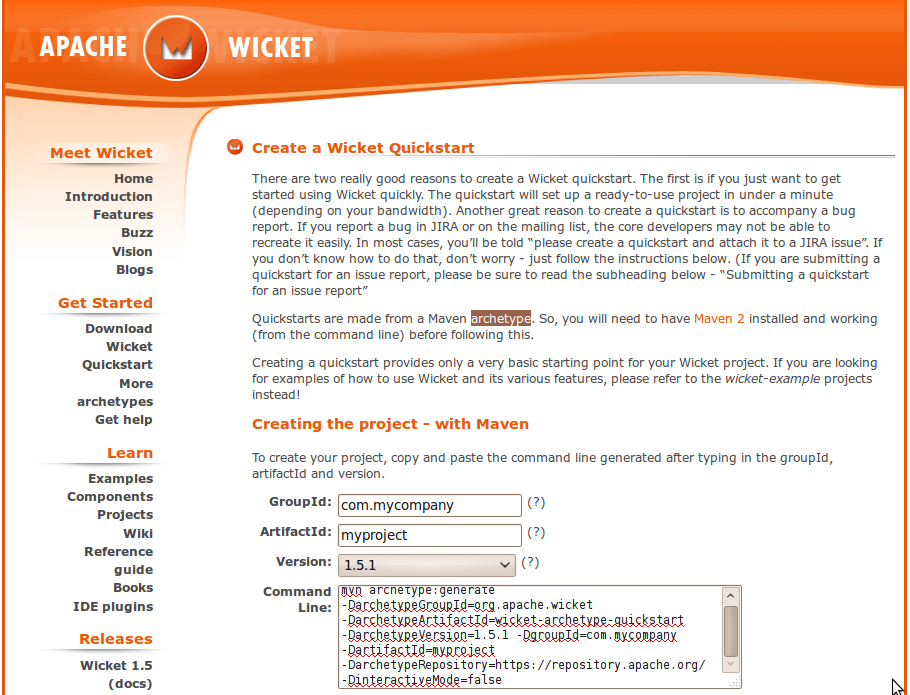 Here we have to specify the root package of our project (GroupId), the project name (ArtifactId) and which version of Wicket we want to use (Version).
Once we have run the resulting command in the OS shell, we will have a new folder with the same name of the project (i.e the ArtifactId). Inside this folder we can find a file called pom.xml. This is the main file used by Maven to manage our project. For example, using “org.wicketTutorial” as GroupId and “MyProject” as ArtifactId, we would obtain the following artifacts:
Here we have to specify the root package of our project (GroupId), the project name (ArtifactId) and which version of Wicket we want to use (Version).
Once we have run the resulting command in the OS shell, we will have a new folder with the same name of the project (i.e the ArtifactId). Inside this folder we can find a file called pom.xml. This is the main file used by Maven to manage our project. For example, using “org.wicketTutorial” as GroupId and “MyProject” as ArtifactId, we would obtain the following artifacts:.MyProject
| pom.xml
|
---src
+---main
| +---java
| | ---org
| | ---wicketTutorial
| | HomePage.html
| | HomePage.java
| | WicketApplication.java
| |
| +---resources
| | log4j.properties
| |
| ---webapp
| ---WEB-INF
| web.xml
|
---test
---java
---org
---wicketTutorial
TestHomePage.java… <dependencies> <!-- WICKET DEPENDENCIES --> <dependency> <groupId>org.apache.wicket</groupId> <artifactId>wicket-core</artifactId> <version>${wicket.version}</version> </dependency> <dependency> <groupId>org.apache.wicket</groupId> <artifactId>wicket-ioc</artifactId> <version>${wicket.version}</version> </dependency> <!-- OPTIONAL DEPENDENCY <dependency> <groupId>org.apache.wicket</groupId> <artifactId>wicket-extensions</artifactId> <version>${wicket.version}</version> </dependency> --> … </dependencies> ...
Importing a Maven project into our IDE
Maven projects can be easily imported into the most popular Java IDEs. However, the procedure needed to do this differs from IDE to IDE. In this paragraph we can find the instructions to import Maven projects into three of the most popular IDEs among Java developers : NetBeans, JetBrains IDEA and Eclipse.NetBeans Starting from version 6.7, NetBeans includes Maven support, hence we can start it and directly open the folder containing our project: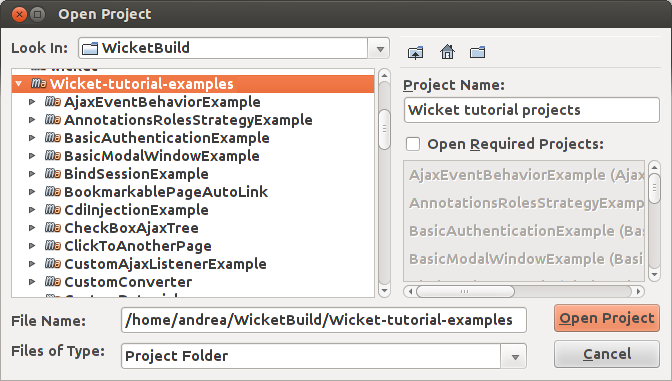 Intellj IDEA
 comes with a Maven importing functionality that can be started under “File/New Project/Import from external model/Maven”. Then, we just have to select the pom.xml file of our project:
Intellj IDEA
Intellj IDEA comes with a Maven importing functionality that can be started under “File/New Project/Import from external model/Maven”. Then, we just have to select the pom.xml file of our project: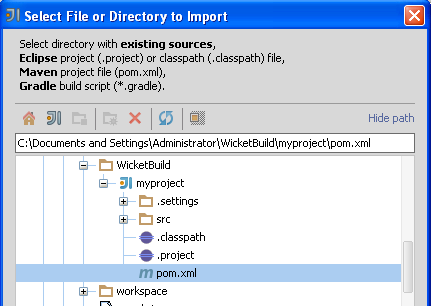 Eclipse
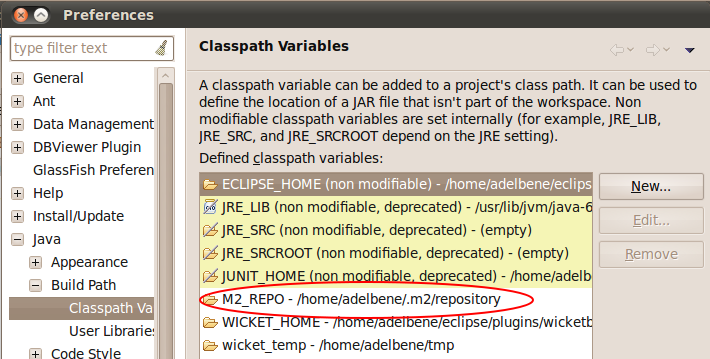
If our IDE is Eclipse the import procedure is a little more complex. Before opening the new project we must generate the Eclipse project artifacts running the following command from project root:
Eclipse
If our IDE is Eclipse the import procedure is a little more complex. Before opening the new project we must generate the Eclipse project artifacts running the following command from project root:mvn eclipse:eclipse
 Once we have created the classpath variable we can go to “File/Import.../Existing Project into Workspace”, select the directory of the project and press “Finish”:
 Once the project has been imported into Eclipse, we are free to use our favourite plug-ins to run it or debug it (like for example "run-jetty-run": http://code.google.com/p/run-jetty-run/ ).
Please note the option “Copy projects into workspace” in the previous illustration. If we select it, the original project generated with Maven won't be affected by the changes made inside Eclipse because we will work on a copy of it under the current workspace.
If we modify the pom.xml file (for example adding further dependencies) we must regenerate project's artifacts and refresh the project (F5 key) to reflect changes into Eclipse.